
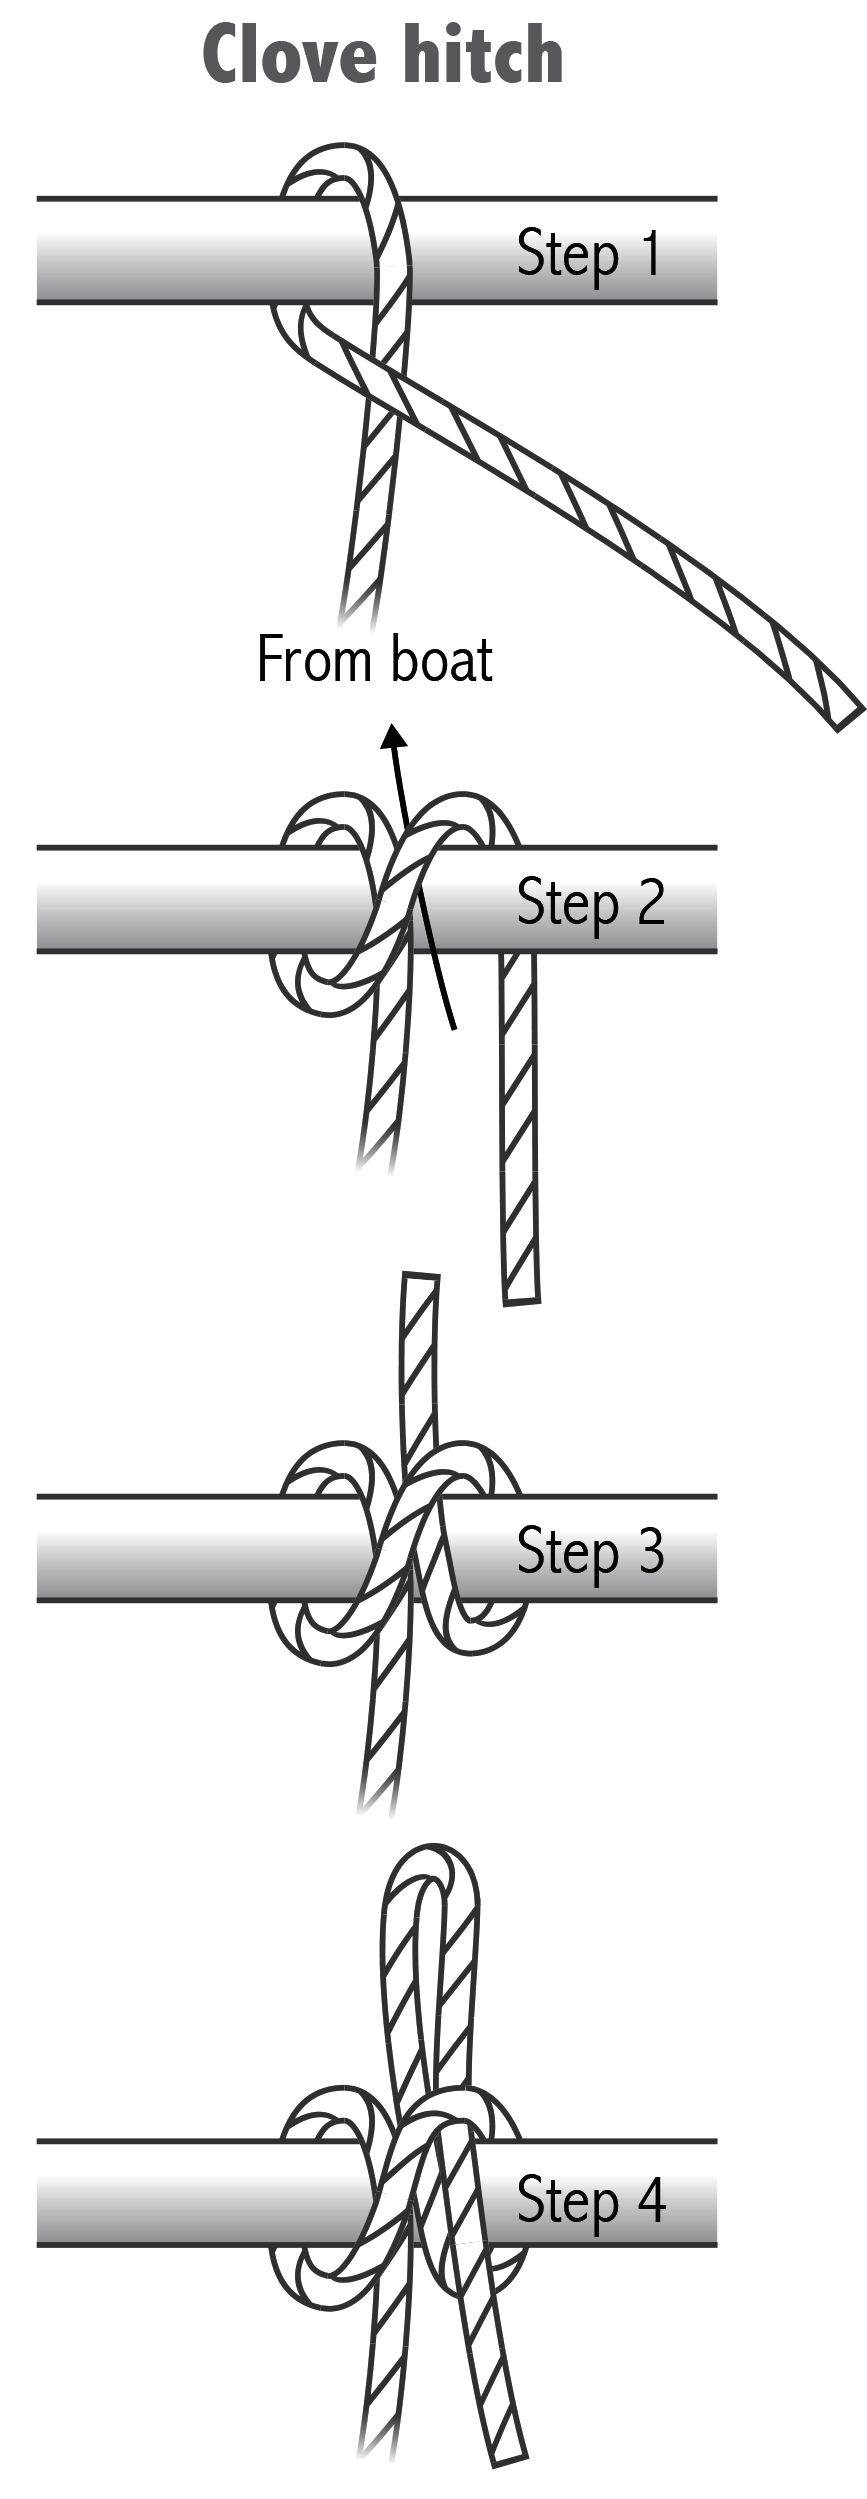
Clove hitch: railing
A clove hitch is not very secure and can easily loosen, but it has many uses because it can be so easily removed. You wouldn’t use it to moor your boat, but the clove hitch is perfect for hanging that coiled rope or a fender.
Step 1
Loop your line over a railing or post. The clove hitch is most secure over a round rail or post. On the underside, pass the end of the line over the line from the coil.
Step 2
Loop your line over the railing again.
Step 3
To finish, pass the end of the line underneath the second loop you made in step 2 and pull the end up.
Step 4
If you have extra line, you can pass a bight through the second loop in step 3, making a quick release.
Fenders
 Your boat is probably equipped with fenders (just a hard rubber tube with a rope running through it) that you can hang off the side of your boat when moored against a towpath lined with stone, wood or corrugated metal. You won’t need them against a grassy bank.
There’s usually some sort of railing that runs along the roof of the boat where you can tie off a fender. Hang it at a height that puts it between the towpath lining and the edge of the boat, otherwise during the night, you’ll hear the boat banging against the stone.
Most people pull up the fenders when the boat is moving and definitely in a lock (so they don’t get caught in any lock mechanisms), although they can be useful when sharing a lock with another boat.
